Tag: dripirrigation

The Tech Your Timed Irrigation Systems Are Missing

Drip irrigation systems are beloved by many for their ability to conserve water and simplify the irrigation process. While drip systems certainly beat out other irrigation systems in terms of water conservation, did you know you could actually be saving even more water in timed irrigation with soil sensors? Soil probes work in tandem with your timed systems but are able to retrieve data based on your crops’ relationship to climate and irrigation patterns. In short, all irrigation systems require a bit of approximation in set-up and irrigating. Soil sensors take the guesswork out of timed irrigation systems and will leave your plants more nourished and your water source less exerted. 

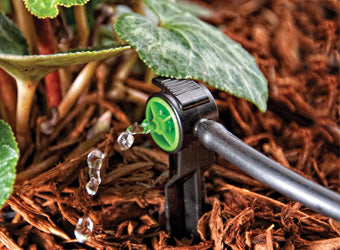
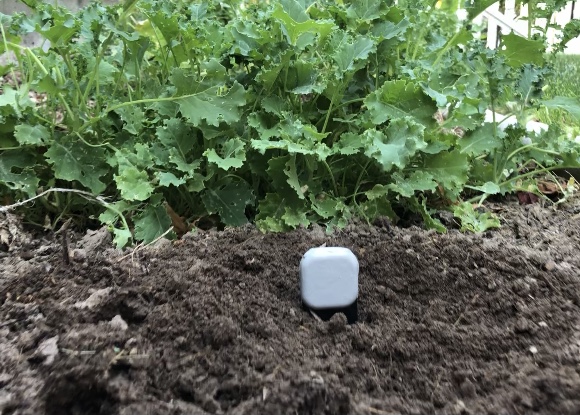
When inserted near crops, soil sensors are able to see below the soil and send data to your smartphone or desktop. Drip irrigation provides a steady source of direct water but cannot account for your crops evolving needs, especially when considering changes in climate and sunlight levels. Soil probes help you better understand your plants in ways a timed irrigation system cannot. When paired together, you can adjust your irrigation to meet the changes in your crops as they grow.

Soil sensors measure soil moisture levels, soil salinity, light, and ambient temperature. In other words, with soil sensors, you will receive detailed information on if your crops need more/less water, if your soil needs more fertilizer, if your plants are experiencing any stress, if water is evaporating too quickly from the soil, and if your crops are getting enough sunlight. These are all indicators that drip irrigation cannot measure but can benefit greatly from knowing.

Timed irrigation systems are superheroes for streamlining the irrigation process. Think of soil sensors as your systems’ trusty sidekick–able to account for the crops your irrigation system oversees and make adjustments when necessary. Together, drip irrigation systems and soil probes are a powerful duo, and more than that, they are also an affordable one. Typically, installing a drip irrigation system can cost around $40. While soil sensors can be costly, our soil probes use a low-frequency measuring technique that allows us to produce sensors at a considerably lower price. While you may be hesitant to add yet another gadget to your soil, sensors provide a number of informative benefits. In the long run, sensors will save you money by allowing you to conserve water and reduce long-term wear in drip irrigation systems.

Setting Up A Drip Irrigation System – The Basics

Drip irrigation systems are ideal for farmers looking to conserve water. While this system has promising results, it can be a bit difficult to achieve without the proper set up. There are many drip irrigation kits available to help you set up your own drip system. Whether you already have a kit at hand or are hoping to construct one yourself, this article can help you get started.

Choose the Best Garden Watering Systems - Organic Gardening - MOTHER EARTH  NEWS
Photo by Jerry Pavia in Mother Earth News

Here are the items you will need to set up your own drip system:

  • Pre-punched drip irrigation tubing that is ¼-½ inch thick
  • Drip emitters – plastic device that hooks up to irrigation tubing and releases water droplets into plant
  • Backflow preventer valve 
  • Barbed connectors 
  • Plastic ground stakes
  • Elbow connectors

Once you’ve collected the necessary materials, start laying out rough placements of your tubing and emitters around the area you want to irrigate. Ideally, the drip tubes should weave around the designated area like a picture frame. Each crop should have an emitter nearby that will serve as the crop’s own personal sprinkler. Emitters should be placed between 12-24 inches apart. 

1 & 2 GPH Single Outlet Drip Emitter on Stake (100 Pack) 06-055 - 06-0 —  onestopoutdoor.com
Photo from OneStopOutdoor.com

To ensure that water will flow from your outdoor water source through the drip system, install a backflow preventer valve to your outdoor water line. You may also need a hose adapter to ensure a perfect fit. Once securely attached, connect your main water line to the newly installed backflow preventer valve.

How to Install an Outdoor Faucet | Outdoor remodel, Diy plumbing, Faucet
Photo from FamilyHandyman.com

Next, you’ll want to return to your tubing placement and attach the tube to your central hose bib. Use barbed connectors to attach your pre-punched tubing and emitters. Then, secure the connected tubing with plastic ground stakes to ensure all your hard work stays in place. 

Photo from GrowOrganic.com

As you repeat these steps over the whole area, the tubing may have to turn at a sharp angle. To avoid damaging the drip system, cut the tubing and reattach it with elbow connectors. This will ensure water flows continuously. Once finished, cut the tubing and leave the end exposed so you can drain it with water later. Drip irrigation systems should be flushed every 4-6 months to avoid water blockage or erosion. Finally, cover the entire tubing area with a few inches of mulch. This will stop water from evaporating before it can reach your crops and conserve water.

Drip Irrigation System Buying Guide
Photo from Lowes.com

Hopefully these steps help you easily set up your drip irrigation system. The entire process should take no more than a few hours and costs under $50. Drip irrigations are affordable to set up and will save you money down the line by maximizing water and plant growth. Most of all, drip irrigation systems are durable when properly maintained and hopefully will continue to save you water for many growing seasons to come.